Setting Up Ghost Locally for Arloxx.com – From Scratch to Custom Theme

When I decided to build Arloxx.com, I wanted it to be more than just a portfolio — I wanted it to become a living lab. A place where I could share my projects, my learning process, and the ideas that shape the way I see technology and creativity.
I chose Ghost as the platform to build it on because it strikes the perfect balance between simplicity, performance, and flexibility. It’s built on Node.js, fast, self-hostable, and open-source — all things I value. Plus, it’s developer-friendly, which makes it ideal for customizing and integrating with my own workflows.
This post documents the first stage of that journey — from securing domains and configuring DNS to setting up Ghost locally, breaking it, fixing it, and creating the foundation for what will eventually become the full Arloxx ecosystem.
Part 1
Name, domains & planning.
1. Choosing the Name and Domains
Before writing a single line of code, I spent time defining what Arloxx was going to represent. I knew I wanted a name that felt both personal and technical, something that could evolve with me as a creator and engineer.
After checking several domain options, I secured both:
- arloxx.com – the main domain, my global identity.
- arloxx.es – the Spanish mirror, representing where I am and where this project is being built from.
Having both gave me flexibility — I could later decide which would serve as the main entry point, and how to structure redirects, subdomains, and localized content.
2. Domains, DNS & Web Redirection
Once the name Arloxx was set, it was time to connect it with the real world — through domains and DNS.
From the beginning, I registered and managed three domains and subdomains that would shape the backbone of my setup:
- arloxx.ghost.io – the Ghost(Pro) hosted version, used as the starting point and later as a reference for migrating data and themes.
- arloxx.com – the main domain, where everything ultimately points.
- arloxx.es – the Spanish mirror, used for local visibility and regional SEO.
To make things consistent and tidy, I decided to create a clear chain of redirections:
This means that:
- Visiting arloxx.es automatically redirects to arloxx.com,
- and arloxx.com itself points to arloxx.ghost.io, which was hosting the live Ghost instance at the time.
This setup allowed me to start developing and customizing the site locally while keeping the hosted version online — perfect for syncing data, testing, and theme development.
(Screenshot reference: DNS panel showing the CNAME and A records linking arloxx.com to arloxx.ghost.io, and the web redirection from arloxx.es to arloxx.com)
The moment both domains resolved correctly was a small but satisfying milestone — the first visible proof that Arloxx existed beyond just an idea and a folder on my laptop.
3. Planning Everything in Obsidian
Before touching the terminal, I opened Obsidian.
I’ve always believed that clarity of structure is just as important as clean code — so I wanted to plan how this project would grow, how I’d document each step, and how everything would stay interconnected.
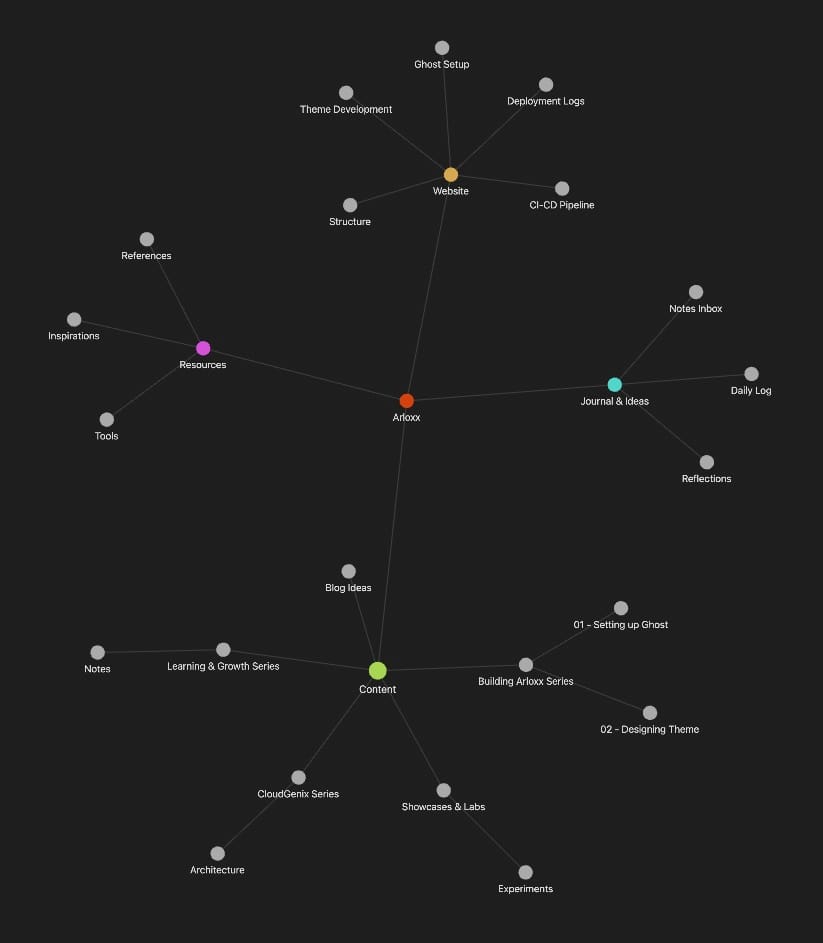
Inside my Obsidian vault, I created a dedicated workspace for Arloxx, where I started logging every action, test, and idea.
It quickly became a mix of a dev diary, technical documentation, and creative lab notebook.
Each note represented part of the process — domain setup, Ghost installation, theme customization, GitHub configuration, etc.
Having everything in one place gave me a clear mental map and made it easy to trace what I did, when I did it, and why.
(Screenshot reference: Obsidian view showing the Arloxx vault and note structure for the project)
This approach also made writing this post possible — I didn’t need to reconstruct the story from memory. Everything was already there, documented step by step, with screenshots and short reflections along the way.
Part 2
Installing Ghost. Setting up Git & GitHub.
4. Installing Ghost Locally
With the plan in place, I was ready to bring Ghost to my local environment.
The goal was to run Ghost locally on my Mac so I could freely modify themes, experiment with layouts, and customize the site without affecting the live version on arloxx.ghost.io.
So, I opened my terminal and navigated to my development folder:
cd ~/Documents/sites/
mkdir arloxx
cd arloxx
ghost install local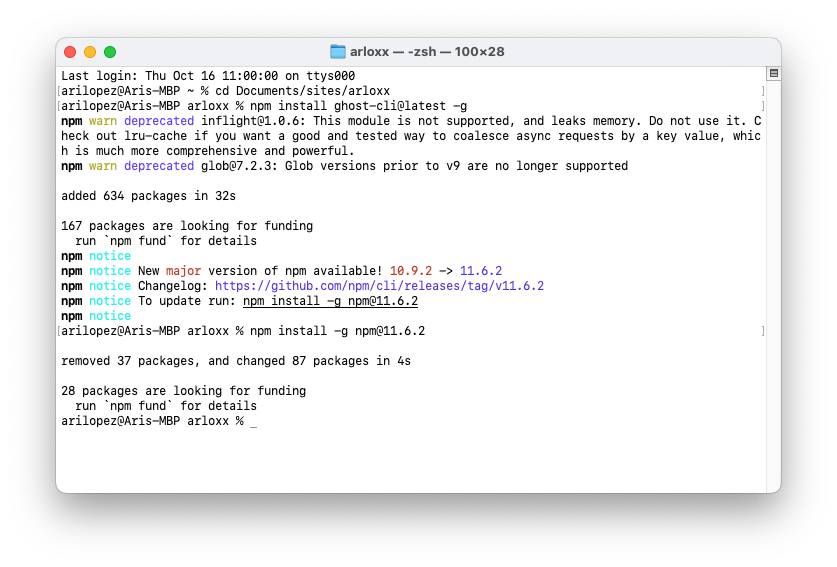
Everything was going smoothly… until it wasn’t.
First Error
Like every good story in tech, mine had an error right at the start.
Ghost threw an unexpected issue during the installation (shown in the screenshot below).
(Screenshot reference: Terminal showing the first Ghost installation error)
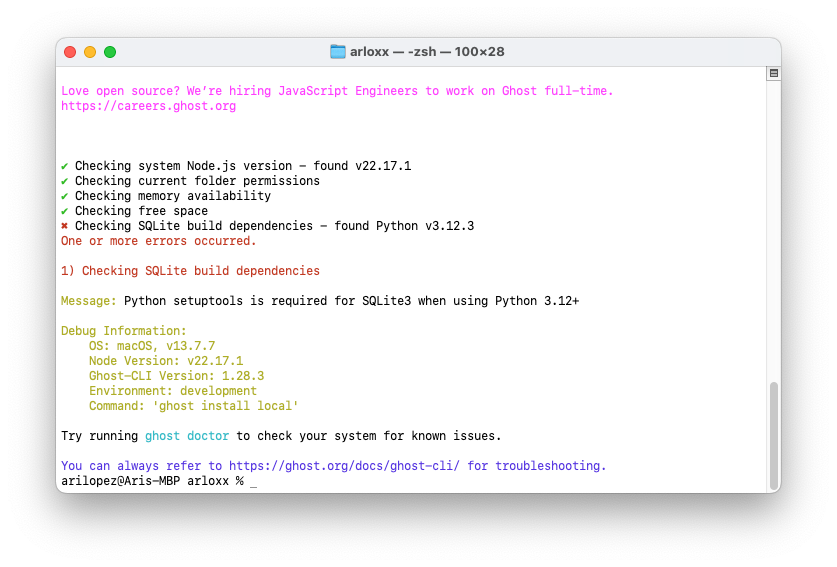
At first, I wasn’t entirely sure what caused it — it could’ve been a Node.js version mismatch, permissions, or even a leftover global installation. But instead of panicking, I took a step back and followed the logs carefully.
Fixing It
After checking the environment, I cleaned up some dependencies and retried the installation with elevated permissions.
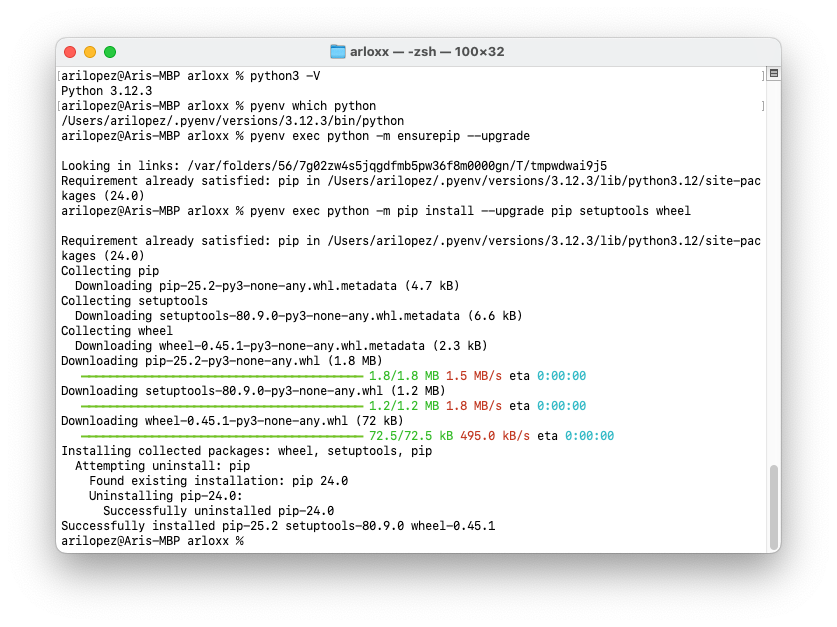
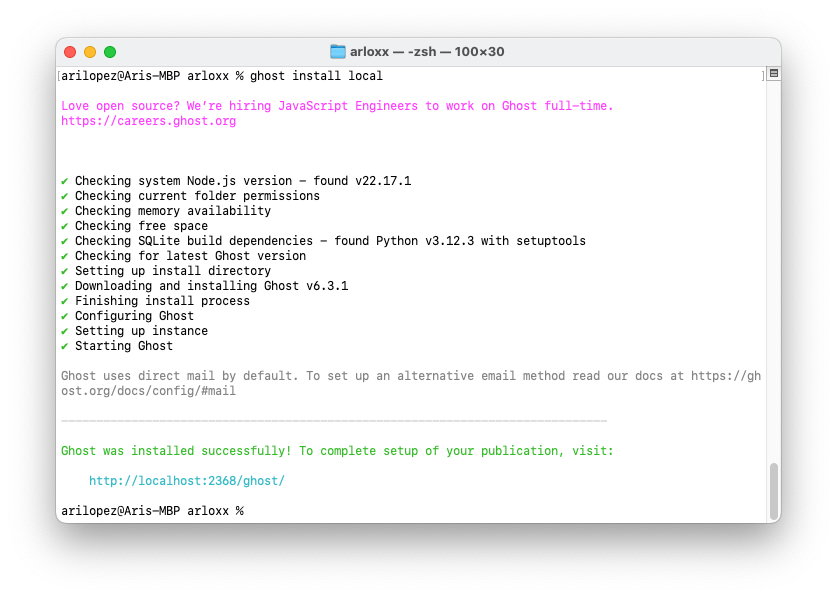
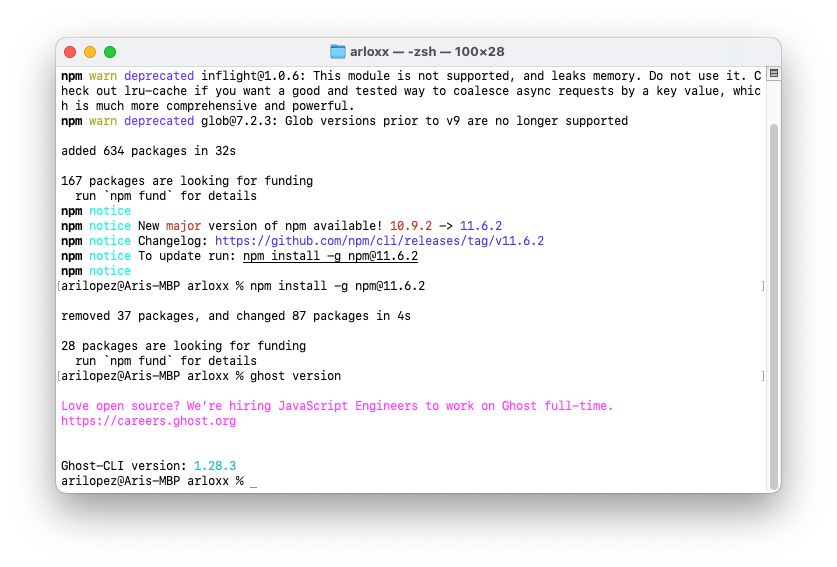
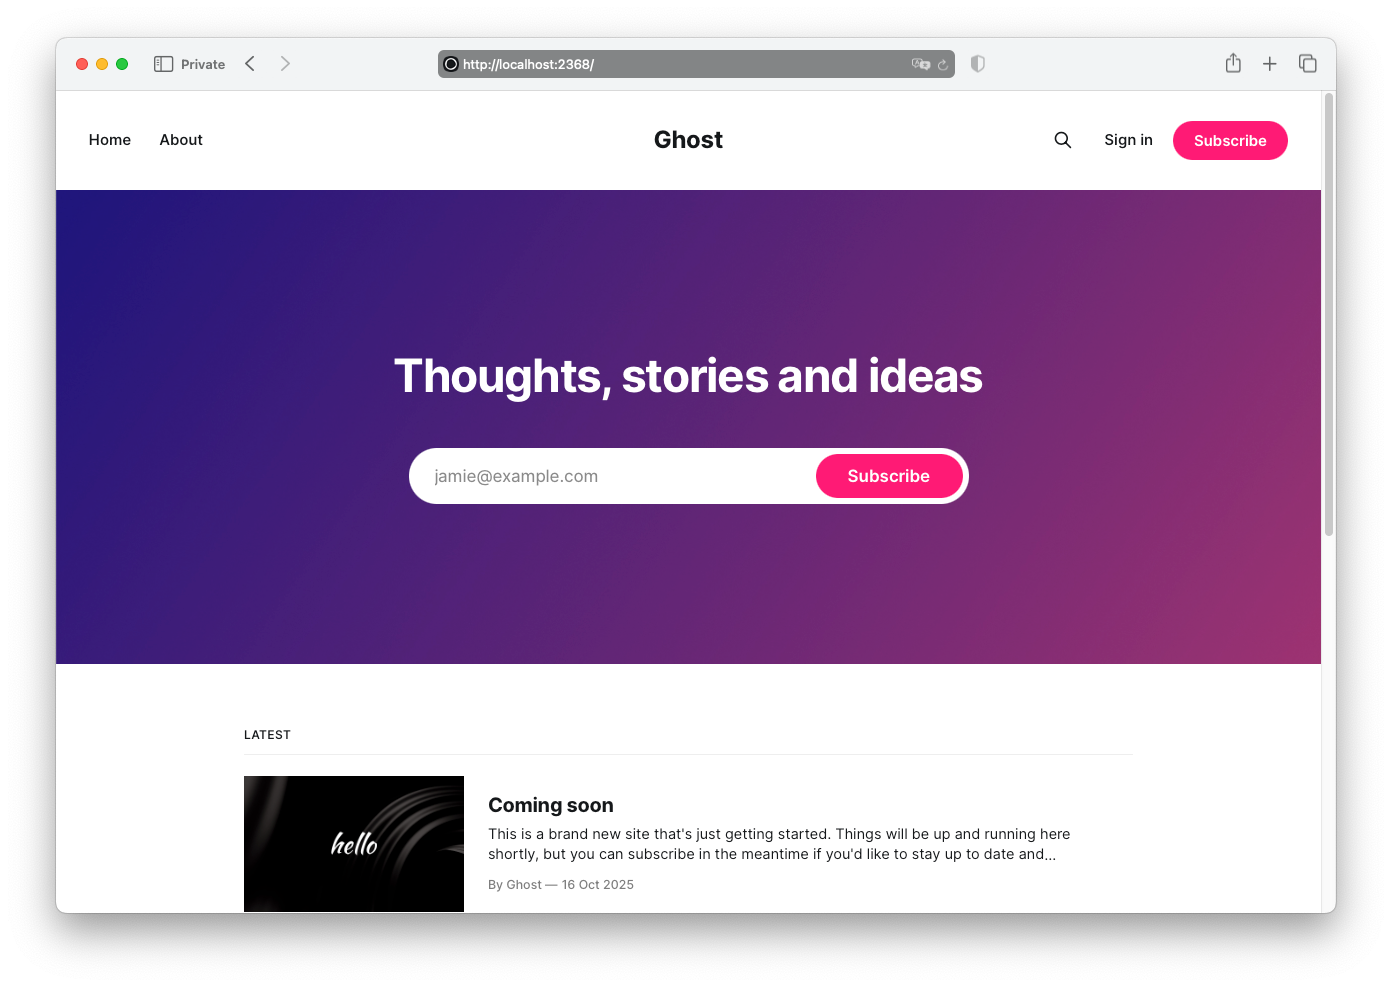
Eventually, Ghost installed successfully and started running locally:
ghost startWhen I saw the message Ghost is running at http://localhost:2368/, it felt great — Arloxx was officially alive for the first time, right there on my machine.
(Screenshot reference: Ghost local instance running successfully in the browser)
5. Git & GitHub Setup
With Ghost running locally, it was time to bring version control into the mix.
I created a dedicated GitHub account for this new stage of my journey: @arloxx-labs — the technical home of everything related to Arloxx.
The goal was to make the entire workflow modular and traceable. Every line of code, every tweak, and every theme adjustment would live in a Git repository. That way, I could sync changes easily between my local environment, the Ghost instance, and any future deployment setups (AWS, Terraform, CI/CD, etc.).
git config --global user.name "Arloxx"
git config --global user.email "<something>@arloxx.com"
git config --global core.editor "code --wait"
Checking config:
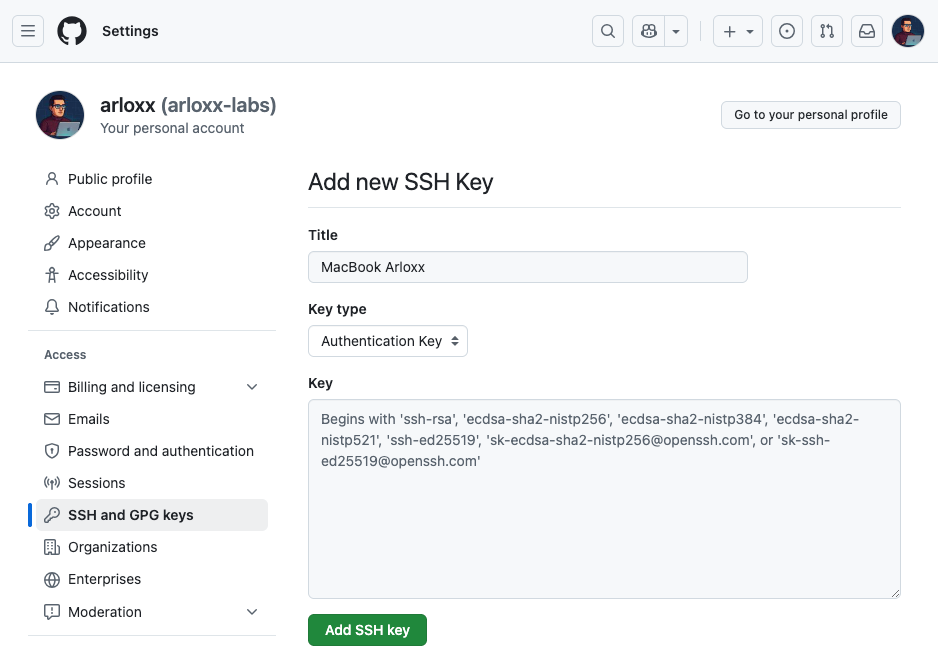
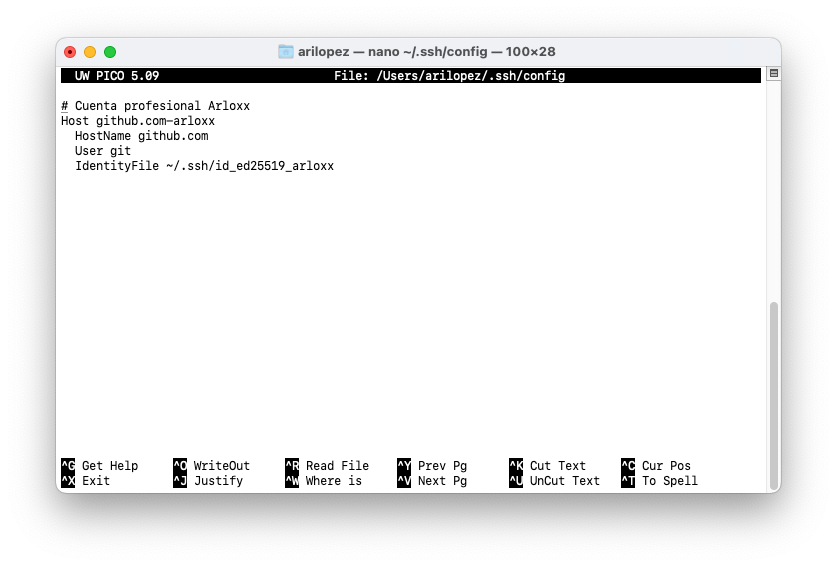
git config --global --listSSH:
ssh-keygen -t ed25519 -C "<something>@arloxx.com"
...
Enter file in which to save the key (/Users/arilopez/.ssh/id_ed25519): id_ed25519_arloxx
...
Your identification has been saved in id_ed25519_arloxx
Your public key has been saved in id_ed25519_arloxx.pub
eval "$(ssh-agent -s)"ssh-add ~/.ssh/id_ed25519_arloxx# Reading public key:
cat ~/.ssh/id_ed25519_arloxx.pub
# or
# Copying it to clipboard:
pbcopy < ~/.ssh/id_ed25519_arloxx.pub
Testing it:
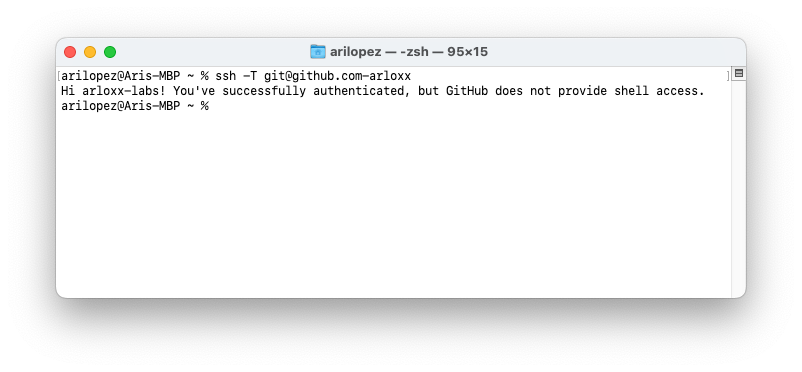
I initialized a new Git repository inside my local Ghost directory:
cd ~/Documents/sites/arloxx/ghost-local/repos/arloxx-theme/
git init
git remote add origin git@github.com:arloxx-labs/arloxx-theme.git
Then I added and committed the initial files:
git add .
git commit -m "Initial Ghost local setup"
git push -u origin main
(Screenshot reference: Terminal showing git initialization and first push to GitHub)
From that moment on, every change I made to the theme, configurations, or assets would be versioned and safely stored in the cloud.
Interlude
Time to clean up my shell configs.
6. Updating .zshrc and .zprofile
To streamline my workflow, I customized my terminal environment by updating my .zshrc and .zprofile files.
I added shortcuts, aliases, and environment variables to make working with Ghost, Yarn, and Git faster and cleaner. For instance, commands like these:
alias gpush="git add . && git commit -m 'update' && git push"
alias ghostdev="cd ~/Documents/sites/arloxx && ghost start"
This allowed me to move between projects, start or stop Ghost, and push updates without having to type long paths or repeat the same commands over and over again.
(Screenshot reference: .zshrc and .zprofile with new aliases and environment variables)

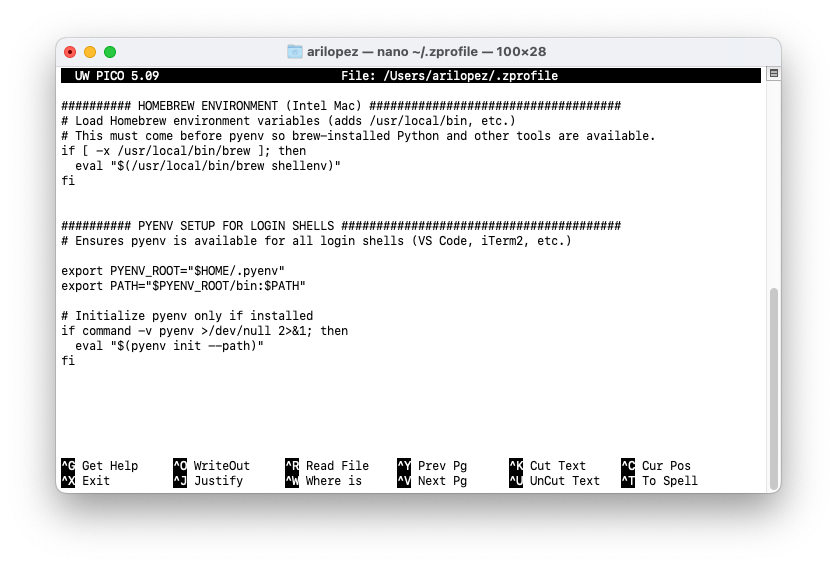
It’s a small tweak, but it makes a big difference in day-to-day development — especially when switching between projects or automating small tasks.
Part 3
Theme, data & essential tools.
7. Downloading Theme and Data from Ghost(Pro)
At this point, I had two Ghost environments:
- arloxx.ghost.io, the hosted version (Ghost(Pro))
- and my local Ghost installation.
To make the local version a true mirror of the live one, I exported everything from Ghost(Pro):
- The current theme
- The content/data (posts, pages, tags, and settings)
Then I imported both into the local instance.
(Screenshot reference: Ghost admin interface showing theme and content export options)
This allowed me to keep the exact same structure, posts, and visual base between both environments — a crucial step before moving on to theme customization.
Now, with my GitHub repo ready, my environment fine-tuned, and my Ghost data locally synchronized, I was finally ready to start transforming the default Ghost theme into something truly mine: the Arloxx Theme.
8. From Casper to Arloxx Theme
Ghost comes with its default theme, Casper, which is clean and minimal — perfect for a quick start. But I wanted something that reflected my own style and philosophy — something that said “this is Arloxx.”
So, the plan was simple:
- Download the current Casper theme from Ghost.
- Use it as the base for my custom Arloxx Theme.
- Modify and expand it gradually — first locally, then through version control.
I downloaded the Casper theme from the Ghost(Pro) admin panel and unzipped it into my local Ghost project directory:
cd ~/Documents/sites/arloxx/content/themes/
unzip ~/Downloads/casper.zip -d ./arloxx-theme
Then I renamed the folder and updated some internal theme references so everything pointed to the new arloxx-theme instead of casper.
(Screenshot reference: Ghost content folder showing arloxx-theme directory alongside the original Casper theme)
From that moment on, every change I made to this theme — even the smallest — would be part of the Arloxx brand.
9. Installing Yarn & Gulp Globally
To customize the theme and work efficiently with modern frontend tools, I needed Yarn and Gulp — essential tools for compiling styles, bundling assets, and running live reload during development.
I installed both globally using npm:
sudo npm install -g yarn gulp-cliThis ensured I could manage dependencies and run build tasks for the theme directly from the terminal.
(Screenshot reference: terminal showing successful installation of Yarn and Gulp)
10. Installing Dependencies with Yarn
Once the tools were ready, I navigated into my new theme folder and installed all required dependencies:
cd ~/Documents/sites/arloxx/content/themes/arloxx-theme
yarn install
This pulled in everything defined in the package.json file — libraries, scripts, and build tools needed for Ghost’s frontend pipeline.
(Screenshot reference: yarn install running in the terminal, showing dependencies being downloaded)
From here on, I could start using commands like yarn dev or gulp to rebuild the theme automatically every time I made a change — an essential workflow for testing and refining the design in real time.
Part 4
Theme's configuration & activation.
11. Modifying package.json
With the local environment set up and all dependencies installed, the next step was to adapt the theme’s configuration files — starting with package.json.
This file defines your project’s metadata, dependencies, scripts, and build commands.
By modifying it, I could customize the name, version, and development scripts to match the Arloxx Theme rather than Casper.
For example, I changed entries like these:
{
  "name": "arloxx-theme",
  "version": "1.0.0",
  "description": "Custom Ghost theme for arloxx.com",
  "author": "Ariel López",
  "scripts": {
    "dev": "gulp",
    "build": "gulp build",
    "zip": "gulp zip"
  }
}
(Screenshot reference: VS Code open on package.json with Arloxx theme details)
These changes made the project feel alive — no longer a clone, but something unique and personal.
12. Activating the Arloxx Theme Locally
Once the theme was set up, it was time to activate it inside the local Ghost environment.
To do that, I navigated to the Ghost Admin interface at: http://localhost:2368/ghost
Then, under Settings → Design → Themes, I uploaded and activated my custom arloxx-theme.
(Screenshot reference: Ghost Admin panel showing Arloxx theme activated)
Immediately after activating it, I refreshed the local site — and there it was: the same structure as before, but now powered by my own theme.
It might’ve looked similar to Casper at that point, but psychologically, this was the moment where Arloxx.com started to have its own identity.
13. Importing Data Locally
To make sure the local site reflected my live Ghost(Pro) environment, I imported the data I had exported earlier — posts, tags, pages, and settings.
This step was key because it allowed me to work with real content instead of placeholders, which helps test layout behavior, typography, and component spacing more effectively.
The import process was simple:
- Go to Settings → Labs → Import Content.
- Select the
.jsonfile exported from Ghost(Pro) earlier. - Wait for Ghost to rebuild the content locally.
(Screenshot reference: Ghost Admin interface showing the Import Content section)
After a few seconds, everything was there — every post, every tag — now running on my machine under the Arloxx theme.
Part 5
Testing it… Breaking it… Fixing it.
14. First Tests Modifying the Theme on VS Code
Once the local site was running with my data and theme, I opened the theme folder in VS Code and started exploring the files.
The first changes were small — color tweaks, spacing adjustments, and typography experiments.
I wanted to test how Gulp and Yarn handled live rebuilds and confirm that everything was compiling correctly.
yarn devThe process was fast and smooth. Every time I saved a file, Ghost automatically reloaded the changes in the browser — instant feedback, just how I like it.
(Screenshot reference: VS Code with the Arloxx theme open, terminal running yarn dev, browser showing local changes)
This was the start of the creative phase: experimenting, refining, and shaping the site visually while keeping everything tracked in Git.
15. Breaking It
At this point, everything was running perfectly.
Ghost was installed locally, the Arloxx Theme was live, and I was already testing changes in real time.
But then, I decided to make things a little tidier.
I wanted to move Ghost’s installation from:
~/Documents/sites/arloxx/
to:
~/Documents/sites/arloxx/ghost-local/
It was a small change — just a folder reorganization — but as any developer knows, even the smallest changes can sometimes cause big headaches.
After moving the folder, Ghost refused to cooperate.
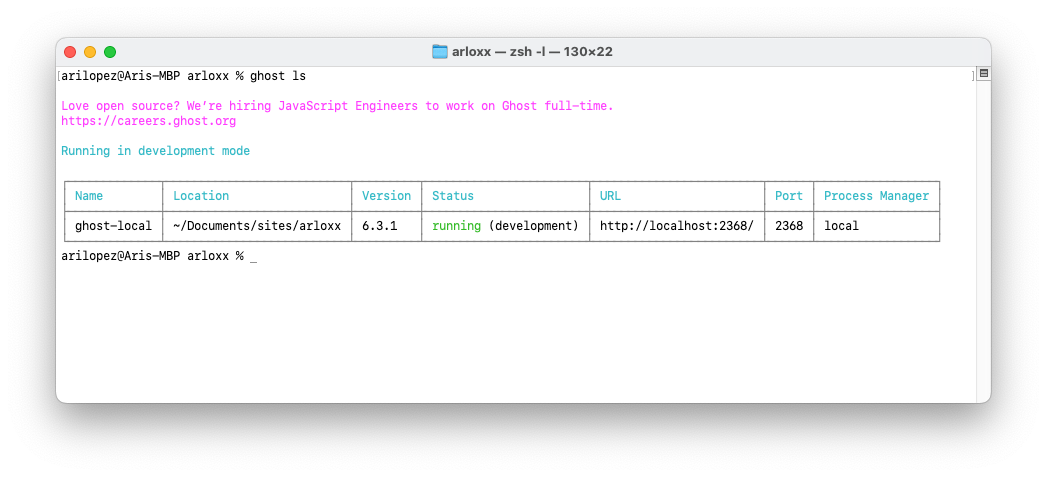
I managed to get it running again manually, but whenever I tried commands like ghost ls or ghost status, the terminal would say that Ghost wasn’t installed.
arilopez@Aris-MBP ghost-local % ghost ls

Love open source? We’re hiring JavaScript Engineers to work on Ghost full-time.
https://careers.ghost.org

No installed ghost instances found
Technically, the site still worked.
But seeing that warning message every time I ran a command didn’t sit right with me.
I wanted a clean, predictable setup — no ghosts in the shell (pun intended).
(Screenshot reference: terminal showing Ghost not detected after moving folders)
16. Fixing It — Starting From Scratch
So I made a decision that felt both painful and satisfying:
I uninstalled everything and started from scratch — this time, with the right folder structure from the beginning.
ghost uninstall
rm -rf ghost-local
mkdir ghost-local
cd ghost-local
ghost install local
This clean reinstall was the best thing I could’ve done.
Everything worked flawlessly afterward — Ghost commands responded correctly, the site loaded perfectly, and I could continue developing with peace of mind.
(Screenshot reference: terminal showing Ghost successfully reinstalled and running locally)
It’s one of those lessons you learn by doing: sometimes it’s better to start over clean than to keep patching a broken setup.
17. Creating a Symlink for the Arloxx Theme
After reinstalling Ghost in the new folder, I needed to reconnect my Arloxx Theme — but I didn’t want to copy the theme files manually every time I made a change.
The solution?
A symbolic link (symlink) between my main theme development folder and Ghost’s local theme directory.
This way, any change I made in my primary theme workspace would instantly reflect in Ghost.
Here’s the command I used:
ln -s ~/Documents/Sites/arloxx/repos/arloxx-theme ~/Documents/Sites/arloxx/ghost-local/content/themes/arloxx-theme(Screenshot reference: terminal showing symlink creation between theme folders)
This setup allowed me to keep a clean, modular workflow — my theme in one place, Ghost in another, both perfectly connected.
It might sound like a small technical detail, but this trick completely changed how I worked with Ghost locally. I could edit, rebuild, and test instantly, without cluttering the Ghost installation folder.